

Python is one of the most popular programming languages today. This language has simplicity, versatility, and a powerful ecosystem of libraries. If you are a complete beginner install Python on Windows 11 machine is the first step toward building web applications, analyzing data, automating tasks, or diving into machine learning.
You will learn how to install Python Windows 11 using multiple methods, configure environment variables, verify the installation, and set up a professional development environment. By the end, you’ll be ready to write and run Python code on your system.
Why Install Python on Windows 11
Windows 11 offers excellent support for Python development. With native integration in Visual Studio Code, Windows Terminal, and even the Microsoft Store. Installing Python correctly allows you to:
- Run Python scripts from the command line or PowerShell.
- Use
pipto install thousands of third-party packages. - Create isolated virtual environments for different projects.
- Build GUI applications, web servers, and automation bots
Now, let’s walk through the best ways to get Python up and running on your Windows 11 PC.
Requirement
Before you begin, make sure you are satisfied with the following requirements:
- Windows 11 editions and 64-bit are recommended.
- You need permission to install software and modify system environment variables.
- Disk space of at least 150 MB for the core Python installation, or much more if you plan to install heavy libraries like NumPy or TensorFlow.
Increase Your Productivity with Python!
Master Python while coding on Windows. Easily utilize Python and supercharge your development workflow.
Method 1: Install Python Using the Official Installer
The official Python installer is the most reliable and flexible method. It gives you full control over installation options, including the ability to add Python to your PATH, install pip, and choose custom directories
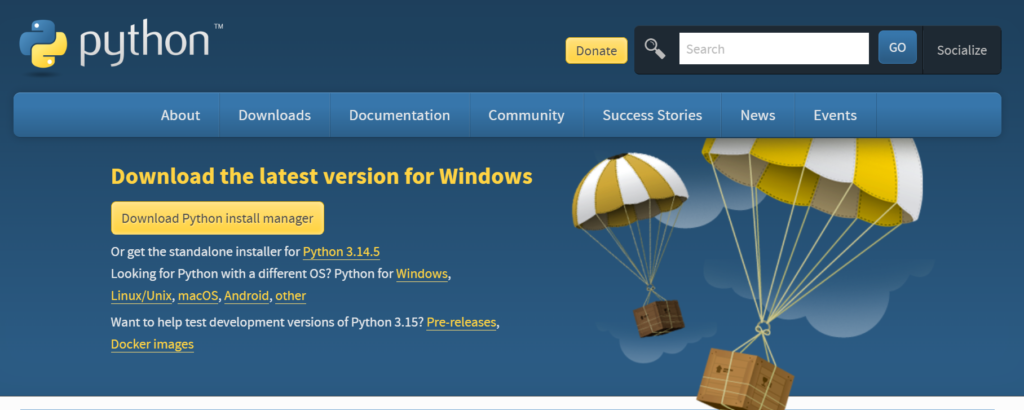
Step 1: Download the Python Installer
Open your web browser and go to the official Python website. The site automatically detects your OS and suggests the latest stable version for Windows. Click the yellow “Download Python [version]” button.
Alternatively, scroll down to the “Looking for a specific release?” section to download an older version if needed, but always prefer the latest stable release for new projects.
Note: If you have a 64-bit system (most modern PCs), the website will provide the 64-bit installer automatically. You can also manually select the Windows 64-bit executable from the list.
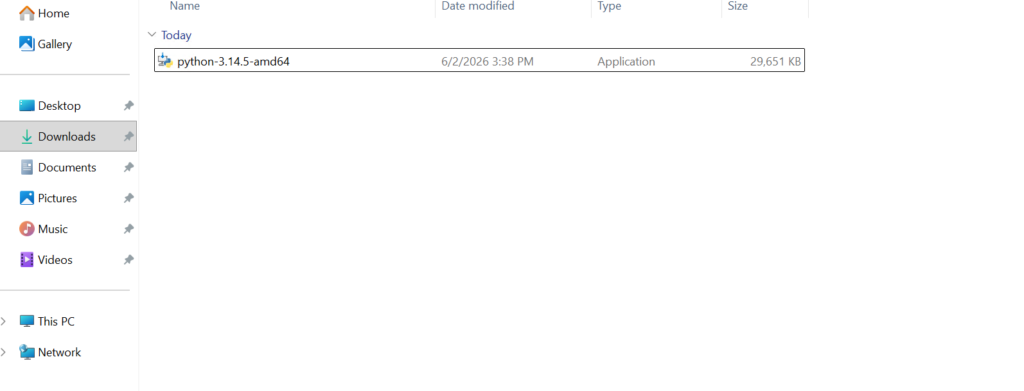
Step 2: Run the Installer
Locate the downloaded file, usually in your Downloads folder. The filename looks like python-x.xx.x-amd64.exe. Right-click the installer and select “Run as administrator” to ensure you have the necessary permissions.
Step 3: Setup Options
When the installer window opens, pay close attention to the bottom of the window:
Check the box that says “Add Python to PATH”. This is essential, as it allows you to run Python from any command prompt window.
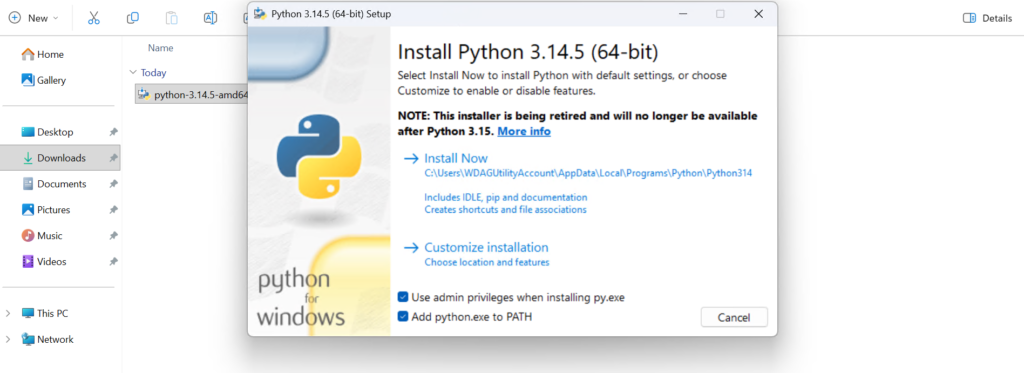
Then, click on “Customize installation”; this gives you more control than “Install Now”, though “Install Now” works fine.
The default (C:\Program Files\PythonX) is fine, but you can change it to something like C:\PythonX or a user folder if you prefer a path without spaces.
Finally, click Install.
Get 20% off on your first hosting purchase. Provide everything you need to create your website.
Method 2: Install Python from the Microsoft Store
Windows 11 includes the Microsoft Store, which offers a streamlined version of Python maintained by the Python Software Foundation in partnership with Microsoft. This method is great for beginners because it handles PATH updates automatically and keeps Python updated through Windows Update.
1. Open the Microsoft Store from the Start menu or taskbar.
2. Search for “Python”. You’ll see entries like “Python version”.
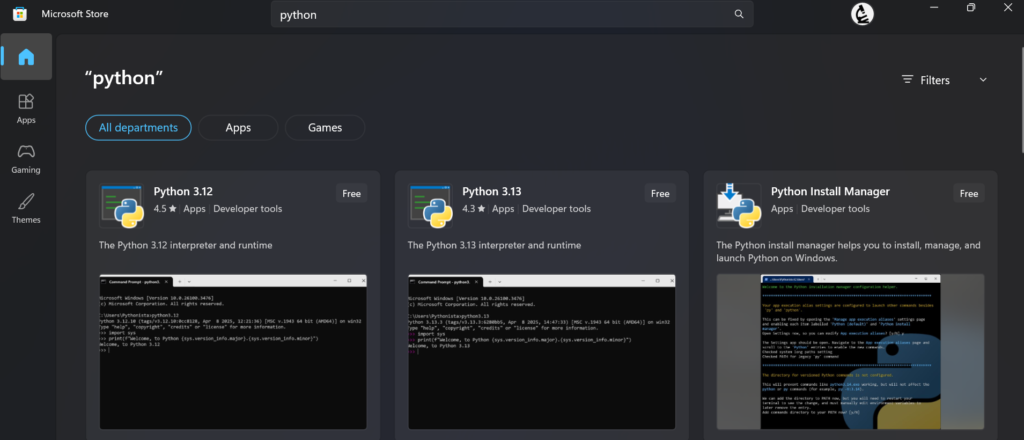
3. Select the latest version, and click Install.
4. Once installed, you can run Python from the command prompt or use the Python app icon that appears in the Start menu.
Limitations
- It installs to a protected system folder
C:\Users\YourName\AppData\Local\Microsoft\WindowsApps\which can cause permission issues when installing global packages. - The
pylauncher may behave differently. - You have less control over installation options
Method 3: Install Python Using Winget
If you loved using the command line and want a repeatable, scriptable installation, Windows 11 includes the winget package manager. Winget can install Python in one line.
Open Windows Terminal or Command Prompt as administrator. Type the following command and hit Enter:
winget install Python.Python.X.xx
Replace X.xx with the specific version you want. To see available versions, run the following:
winget search python
Winget will download the official installer and run it silently with default options. It automatically adds Python to PATH.
This method is ideal for system administrators or developers who want to automate Python setup across multiple machines.
Verify Python Installation
Regardless of which method you used, you should verify that Python is correctly installed and accessible from the command line.
Open Command Prompt or PowerShell, type the following command:
python --version
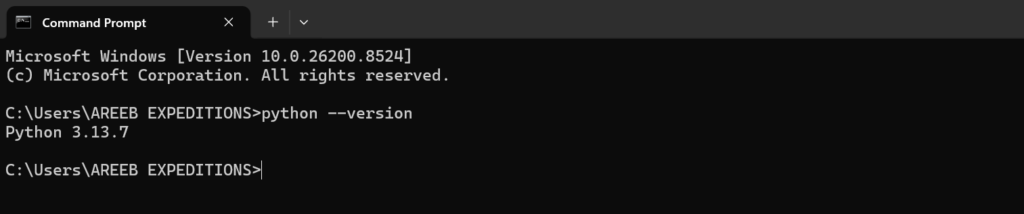
If you see an error like ‘python’ is not recognized, then Python was not added to PATH. Go back to Method 1 and re-run the installer, making sure to check “Add Python to PATH”.
Check Pip Version
Pip is Python’s package manager. Verify it’s available:
pip --version
Best Practices
Now that Python is installed, here’s how to set up a professional environment.
While IDLE comes with Python, you’ll likely want a more powerful editor:
- Visual Studio Code (free, excellent Python extension).
- PyCharm Community Edition (full-featured IDE)
- Sublime Text or Notepad++ (lightweight)
After installing VS Code, add the Python extension from the marketplace to get IntelliSense, debugging, and virtual environment support.
Virtual environments keep project dependencies isolated. This is a must when working on multiple projects. Create a virtual environment:
python -m venv venv && venv\Scripts\activate
Your prompt should change to (venv) C:.… Inside this environment, any packages you install with pip will be stored locally. To deactivate, just type deactivate.
Create a simple script to test everything. Open Notepad, type:
print("Hello, Windows 11!")
Save the file as hello.py on your desktop. Then in the command prompt, navigate to your desktop:
python hello.py
You should see Hello, Windows 11! printed.
Conclusion
Installing Python on Windows 11 is simple, whether you choose the official installer, Microsoft Store, or Winget. With Python successfully installed, you are now ready to explore Python development on Windows 11. Next, consider learning how to use pip efficiently, virtual environments, and setting up a professional IDE like VS Code.
If you found this article helpful, check out our cyber news on NPM Axios supply chain Attack, which discuss how a simple node js package manager ecosystem come under attack.
FAQ
How do I install Python on Windows 11?
Download Python from the official website, run the installer, check “Add Python to PATH,” and complete the installation process.
Is Python free to use on Windows 11?
Yes, Python is open-source and completely free to download, install, and use for personal or commercial projects.
Which Python version should I install on Windows 11?
It is recommended to install the latest stable version of Python to access the newest features, improvements, and security updates.
Why should I add Python to PATH during installation?
Adding Python to PATH allows you to run Python commands from Command Prompt or PowerShell without specifying the full installation path.
How can I verify that Python is installed correctly?
Open Command Prompt and type version command. If Python is installed, the version number will be displayed.
Can I install multiple Python versions on Windows 11?
Yes, Windows 11 supports multiple Python versions. You can manage them using the Python Launcher (py) command.
What should I do if Python is not recognized in Command Prompt?
Reinstall Python and ensure the “Add Python to PATH” option is selected, or manually add Python to your system environment variables.