

Git is one of the most widely used version control systems in the world. It allows developers to track changes in their code, collaborate with teams, and manage projects efficiently. If you want to install Git on Windows 11, there are several methods and configurations you should know to get the most out of it.
This article provides a comprehensive, step-by-step guide to installing Git on Windows 11, configuring it, and ensuring it works easily with your development environment.
What is Git
Git is a distributed version control system created by Linus Torvalds in 2005. It is used for git clone for platforms like GitHub, GitLab, and Bitbucket. Developers use Git to:
- Track changes in source code.
- Collaborate with teams across different locations.
- Roll back to previous versions when needed.
- Manage multiple branches for features, bug fixes, and releases.
On Windows 11, Git can be installed in several ways, depending on your preference for package managers or graphical installers.
Prerequisites
Before installing Git, make sure the following:
- Windows 11 system with administrator privileges.
- Network connection to download Git packages.
- A code editor like Visual Studio Code for seamless Git integration (Optional).
Increase Your Productivity with Git!
Master Git while coding on Windows and Linux. Easily utilize Git and supercharge your development workflow.
Methods to Install Git on Windows 11
There are four methods to install Git on the Windows 11 operating system:
Method 1: Git for Windows Installer
This is the most common method. Git for Windows provides a native installer with Git Bash (a terminal emulator) and GUI tools.
Method 2: Winget (Windows Package Manager)
Windows 11 comes with Winget, a command-line package manager. You can install Git with:
winget install Git.Git
Method 3: Chocolatey
Chocolatey is another package manager for Windows. If you already use it, simply run:
choco install git
Method 4: WSL (Windows Subsystem for Linux)
If you prefer a Linux-like environment, you can install Git inside WSL:
sudo apt update && sudo apt install git
Get 20% off on your first hosting purchase. Provide everything you need to create your website.
Guide to Install Git using Windows Installer
Here’s the most detailed method using the Git for Windows installer:
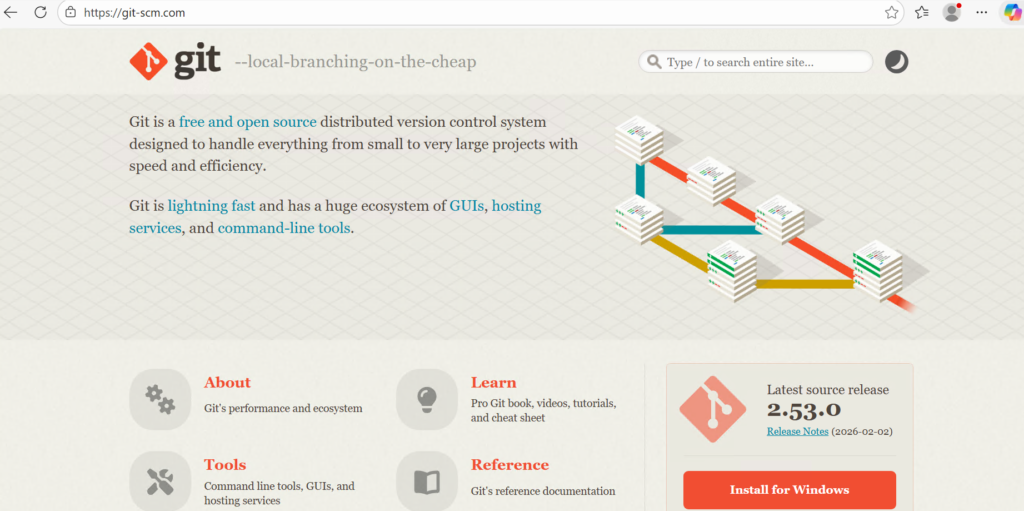
Step 1: Download Git
Visit the official Git website. Click Download for Windows. The site automatically detects your OS version.
Step 2: Run the Installer
Double-click the downloaded .exe file. Grant administrator permissions when prompted.

Step 3: Select Installation Options
The installer will present several options:
- Select Components: Choose Git Bash, Git GUI, and optionally desktop icons.
- Editor Selection: By default, Git uses Vim. You can select Notepad++ or Visual Studio Code if installed.
- PATH Environment: Choose “Git from the command line and also from 3rd-party software” for maximum compatibility.
- HTTPS Transport Backend: Select “Use the OpenSSL library.”
- Line Ending Conversions: Recommend the option is “Checkout Windows-style, commit Unix-style line endings.”
- Terminal Emulator: Choose Git Bash (default).
- Extra Options: Enable file system caching for better performance.
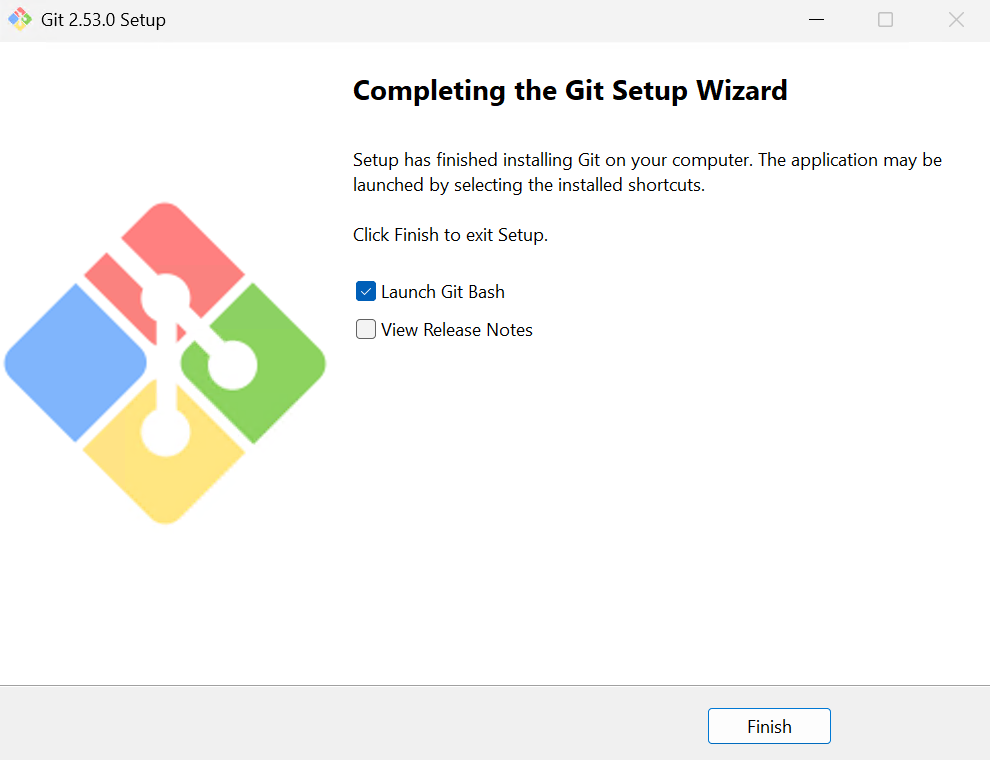
Step 4: Complete Installation
Click Install and wait for the process to finish. Once done, click Finish and optionally launch Git Bash.
Configuring Git After Installation
After installation, configure Git with your identity and preferences:
git config --global user.name "Your Name"
git config --global user.email "your.email@example.com"
Optionally, you can use Git merge in Visual Studio Code:
git config --global core.editor "code --wait"
Verifying Installation
To confirm Git is installed correctly, Open Git Bash or Command Prompt. Run the following command:
git --version
You should see something like:

Troubleshooting Issues
The Following are some common troubleshooting issues discussed below:
- Git not recognized in Command Prompt: Ensure Git is added to PATH during installation.
- SSL certificate errors: Update Git or configure SSL settings.
- Permission denied (publickey): Set up SSH keys with:
- Slow performance on large repos: Enable file system caching in Git settings.
- Permission denied (publickey): Set up SSH keys with:
ssh-keygen -t rsa -b 4096 -C "your.email@example.com"
Conclusion
Installing Git on Windows 11 is a simple process, but choosing the right method depends on your workflow. The Git for Windows installer is ideal for beginners, while Winget and Chocolatey are perfect for developers who prefer automation. For those who want a Linux-like environment, WSL offers the best experience.
Once installed, configuring Git properly ensures smooth collaboration and efficient version control. With Git integrated into your IDE, you will have a powerful setup for managing projects on Windows 11.
Thanks for reading! If you found this article helpful, check out our other guide on installing Cursor AI on Windows and Linux with practical explanation which provides you better understanding of coding with artifical intelligence.
FAQ
Is Git free to install on Windows 11?
Yes, Git is completely free and open-source.
What’s the easiest way to install Git on Windows 11?
The Git for Windows installer is the simplest method for most users.
Can I install Git using command-line tools?
Yes, you can use Winget or Chocolatey to install Git quickly via the terminal.
How do I check if Git is installed correctly?
Run git version in Command Prompt or Git Bash to verify.
Do I need administrator rights to install Git?
Yes, administrator privileges are required during installation.
Can Git be integrated with Visual Studio Code?
Absolutely, VS Code has built-in Git support for commits, branches, and more.
What should I configure after installing Git?
Set your username and email with the provided command.